I had just been at an Operations session on Malcolms layout and I had observed that the 2 locomotive were poor performers in a few departments. This has nothing to do with Malcolms skills as they are really nice models and anybody who models N scale Australian prototype here in Australia have to be very good modellers as they near have to scratchbuild almost everything! I really envy their skillset and patience but am sure glade I model the North American prototype.
Anyhow as the story goes, my eagerness to get the locos tuned had me doing the first RED HEN the following weekend. I quickly returned this to Malcolm and he was very impressed with the results....well thats what he tells me anyhow?!! However then writers block set in ....ER well yeah I just wasn't motivated to do the second one...Sorry Malcolm.
So today I decided to complete the second tune job. I actually think this is a better job than the first locomotive and I guess you would expect that to be the case.
So here is what I observed at the ops session:
- The Locomotives stuttered a fair bit on the track
- They derailed crossing some turnouts
- Generally were erratic runners
It was obvious at the outset that the main issue with the locomotives was there lack of weight. They have a Tomix mechanism with a beautiful 3D printed body (Malcolms design and work here is amazing). TheTomix mechanism is a neat design but only as good as the weight applied at the wheel to rail contact point.

 Step 1: Gather the tools required to do the work
Step 2: Remove the shell and determine how I was going to add weight. I observed that the inside of the roof was significantly clear from the DCC decoder. So I determined to fit one full length of lead sheet into the roof first.

 Step 3: Measure the inside of the roof and cut a length of Lead sheet to fit inside. I also noted that the inside of the roof has 2 x plastic footing areas for the installation of the exhaust stacks. I would have to cut the lead sheet to fit around these. Further the roof is curved and not flat. Again I would have to devise a method of bending the lead sheet to fit.
Here I'm filing out the indentations for the plastic exhaust stack footing on the inside of the Canopy


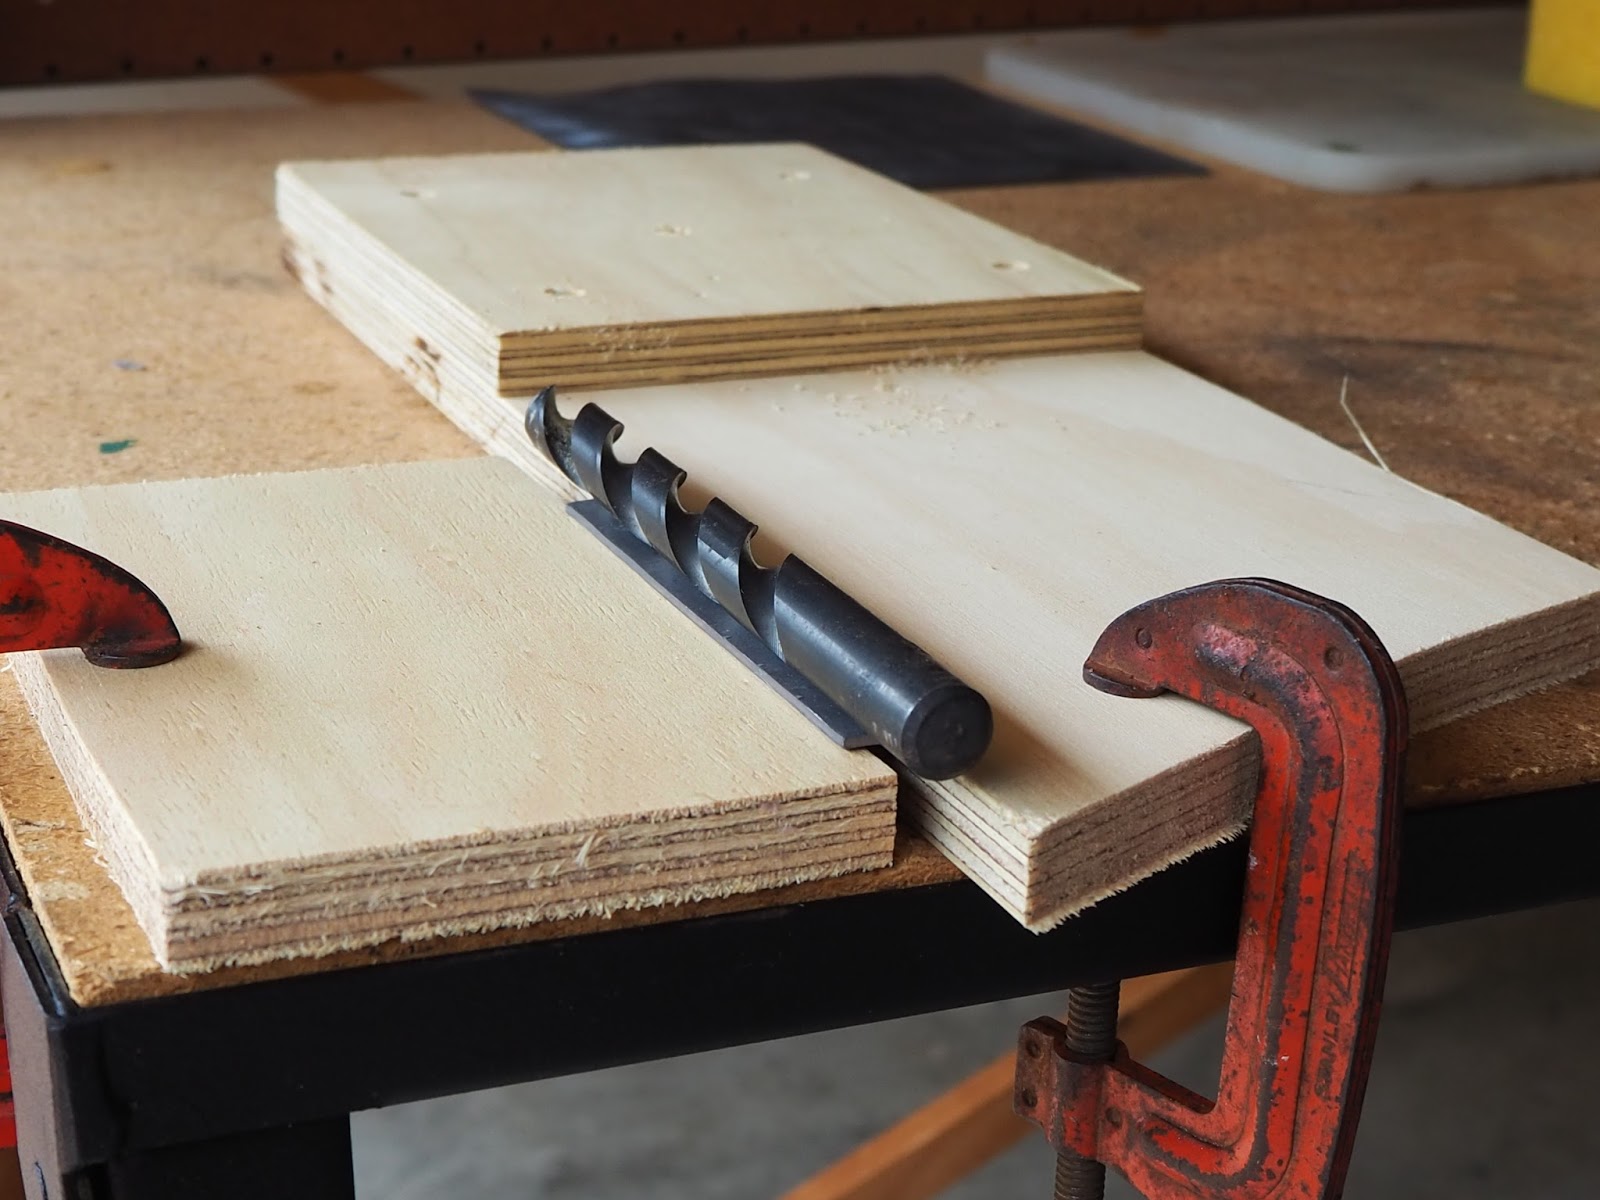
Step 4: I devised a basic jig to put a mild curve in the lead sheet. This was by using 2 small pieces of ply clamped to the work bench parrallel to each other with a gap slightly smaller than the width of the lead strip.
Then with a rubber mallet and a drill bit placed over the center of the lead strip which was placed across the gap. I proceeded to lightly smack the drill bit until the lead strip was the right shape.

 Step 5: Test fit the lead strip.......

Step 7: Add as much weight as possible. Here I've added some shorter weights to the lead strip glued to the inside of the roof
Once I was satisfied with the above steps, and the shell test fitted over the mechanism perfectly......I placed the locomotive on my layout and test ran it. This worked pretty well and the improvements so far have made a significant positive step forward. However the locomotive is till a little jerky to a details freak like me but I suspect that that is the Tomix mecahnism and there is not a lot I can do here.
It was now time to make a couple of other fine tuning check. Firstly the wheel sets. Typical of a lot of locomotives...Including Kato, Atlas etc, the wheel were not in gauge. This would explain many of the derailments I observed during the Ops session. So I regauged the wheels utilising a screwdriver and an NMRA check gauge...Got to love the NMRA!!!!


 Next was a coupler height check. Oh dear one end was really low!!!
 Adjustments made and now Malcolm hopefuly has a sweet performing Locomotive
No comments:
Post a Comment